
This is a short post, as it represents a time where I was largely just twiddling my thumbs waiting for the one final (I hoped) oil seal to arrive before I could start the motor rebuild.
Given that I had sorted, as much as I was going to, the parts that would be visible to the rest of the world in the Instagram pictures, it seemed a good time to look at the bits that I’d see as the rider and tidy them up as much as I could.
This boils down to looking at:
- The front fairing stay (the lightweight frame that holds gauges, lights and fairings on the front of the bike);
- The triple clamp;
- The gauges; and
- The switchgear (the controls on each handlebar).
With my energy for stripping back and painting things waning, I parked any idea of doing the switchgear or the triple clamp. I figured I’d wait until I was going to need to dismantle it to do steering head bearings and do it all in one hit.
The gauges were parked too, mainly due to cost – I’m not aware of all that much that can be done to rejuvenate gauges other than giving them a damn good clean, which I had already done. They were in reasonable nick anyway, not enough to give me the proper irrits.
The fairing stay however, that needed sorting. It was bent, scratched, rusted and just generally crap, and was going to stick out like a sore thumb to me when riding it, particularly when nestled next to freshly painted plastics.
Removing it was simple – just a few plugs and screws – and once again the ‘Dodgy Brothers Painting Company’ went to work after some more rust removal with the drill and wire brush attachment, followed by a light sand…
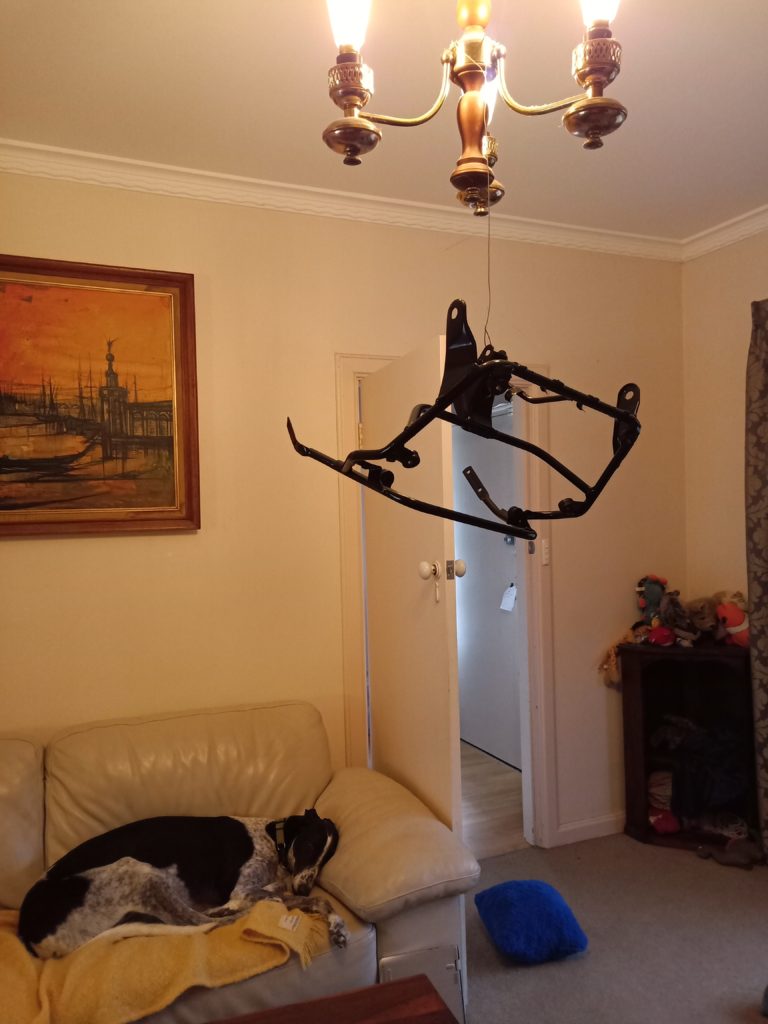
The cold weather did make life somewhat challenging in terms of drying, so the lounge room light was repurposed for the night to give the part a solid evening in front of the fire to dry out. The dog didn’t seem to mind too much at least.
Fitting back on was again a simple process, and left the whole thing looking miles better than the original, and as I was admiring the work I got a message from the spray painter to let me know that they were ready to do my plastic bits, but there was a small problem.
You may recall that the damage to the upper fairing led me to purchase a replacement fairing blank from Airtech in the USA. While the fairing was exactly what is said on the box, what I hadn’t realised is that it was a genuine blank, without any of the holes, or more importantly the mounting points, needed to make it an exact replica of the original and mount up as it needed to.
The mounts were the killer. To get these right would need a fair bit of effort to build up replacement ones, and even then, getting them in exactly the right spot would be difficult. Not impossible, but it would take more time, cost more, and after a long chat about the pros and cons of each path, we decided to repair the banged up fairing instead. The risk in the first place of doing this was the arm of the upper fairing – this was slender, and a high risk of breaking due to its position (wedged between the fairing stay and the mirrors, carrying a fair bit of vibration). The solution was to reinforce the arm with a thin strip of steel combined with high-strength plastic glue. The end result was that one arm was slightly thicker than the other, but the quality of the job meant that nobody other than me would ever pick it unless they were really, really looking for it.
With this agreed, the painting commenced. It was slightly irritating to have paid over AUD300 to get the extra fairing into the country, but such is life on a project bike. It now sits in the shed, looking out over the back yard. Maybe I’ll keep it as a spare for another FZR600 (track bike perhaps?), or turn it into a piece of abstract art, or sell it on eBay. At the end of the day, it was the right call.
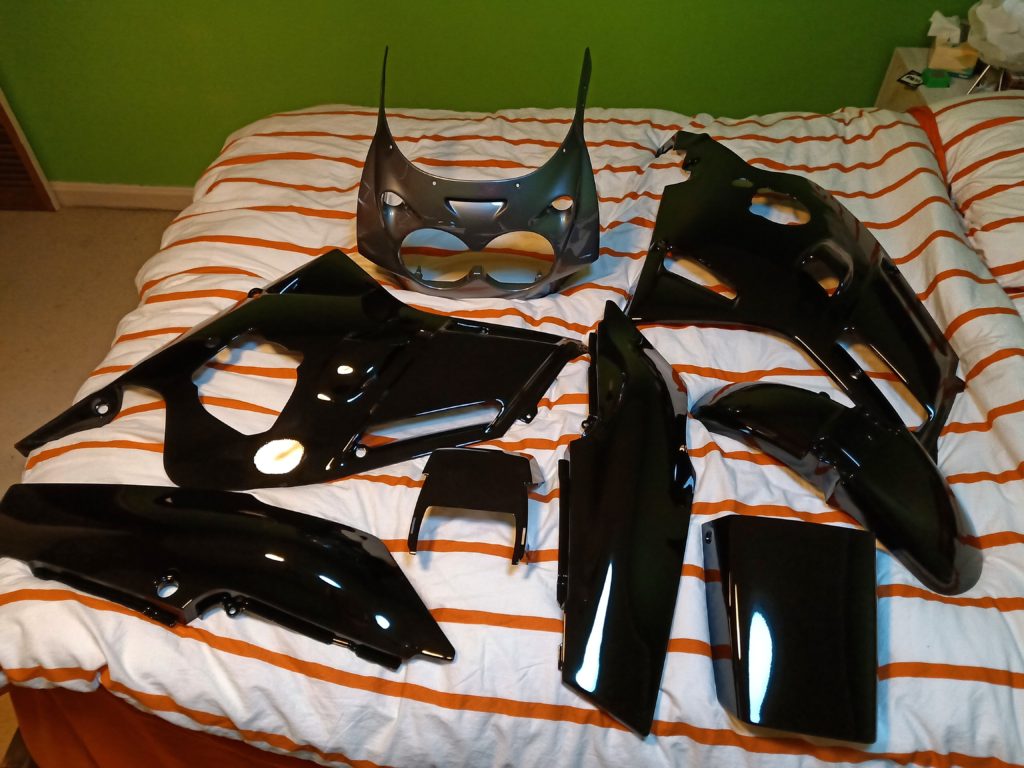
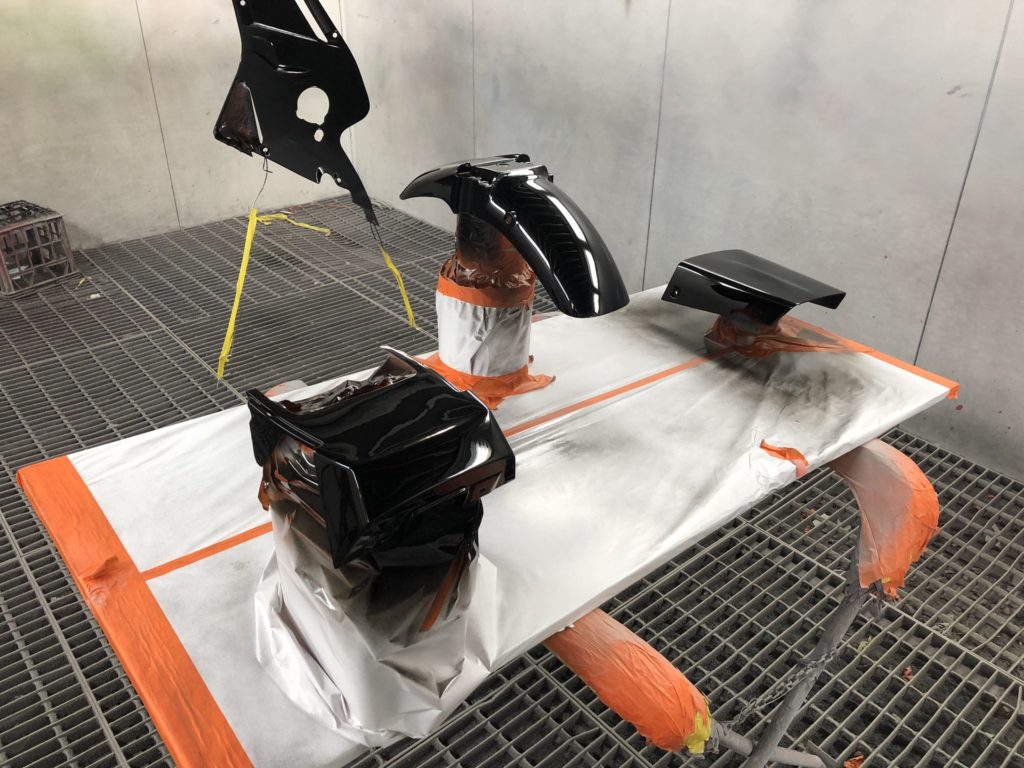
It was a couple of days later that I got the call to come pick up the plastics in their completed state (minus decals), and all I could say was wow. Overall it cost AUD1000 to do the work, a little more than first planned but far less than any other quote, and the results were stunningly good.
The biggest challenge on the day I brought them home was to not go out and fit as many as I could to see what it would look like. This would serve no purpose other than to risk damaging the still hardening paint. Instead I tucked them away for a couple of weeks for the paint to cure before taking them to a signwriting shop to get the decals applied, hoping that in the meantime the final oil seal would hurry up and arrive from Japan.
Until then, I had run out of work to do.
Next up: Decals and rebuilds