In my last post I had reached a bit of an impasse with the motor rebuild, waiting on parts that had to come from Japan and which would take at least a couple of weeks before arriving.
This led to a question about what to do to fill the time in between.
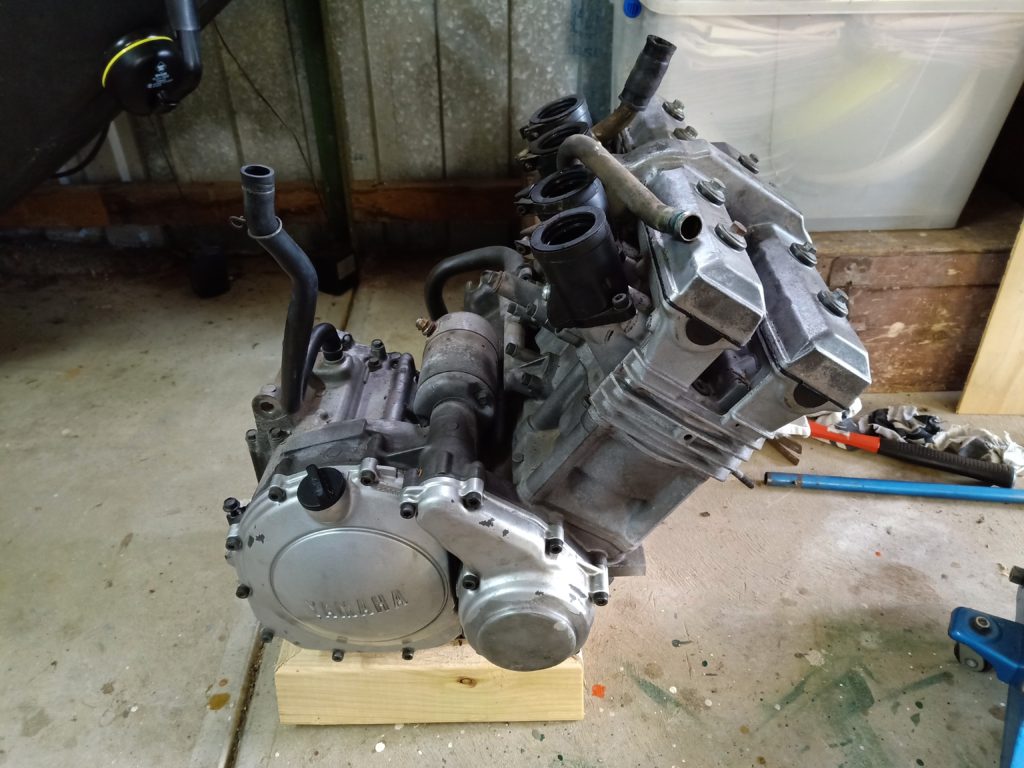
First up was removing the old motor. This was actually one of the easier parts of the whole process, and simply required undoing a few bolts, disconnecting a few hoses and wires, and with the help of another pair of hands and a small trolley jack, out it came.
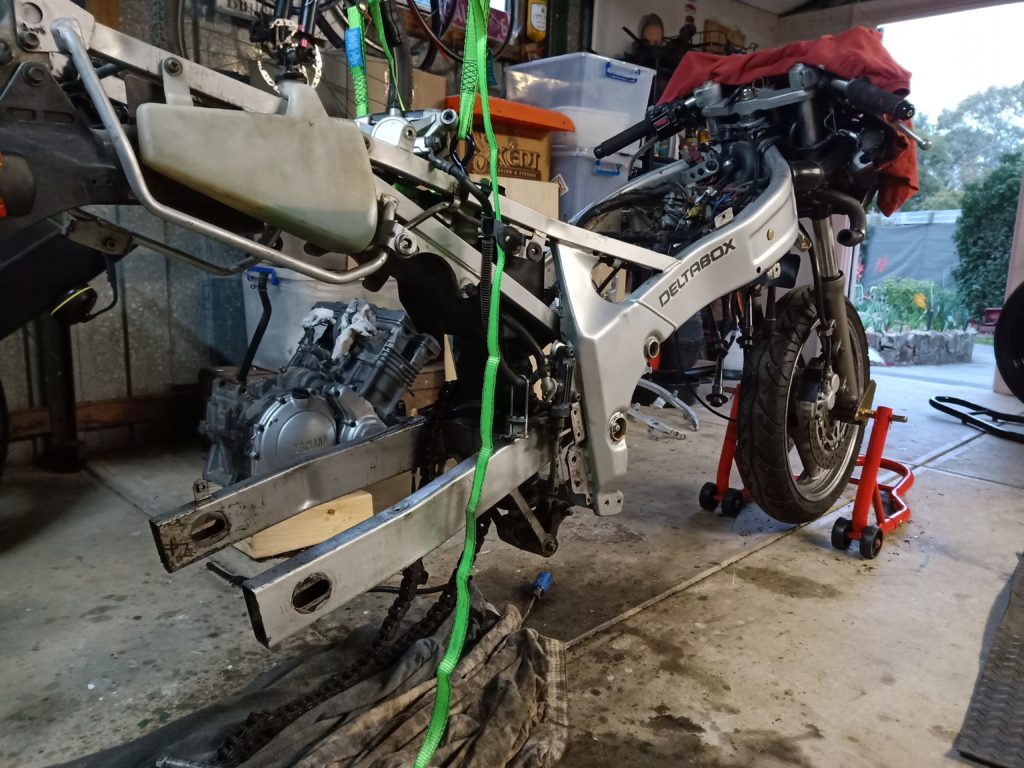
This left me with a spare motor off to one side ready to harvest parts from, and a rolling chassis which had almost certainly not been given any love since it rolled off the showroom floor in 1990.
It also left me with the next conundrum to work through – how far to take the strip down and restoration process. This came down to two main factors – risk and money.
I have seen plenty of examples of people stripping FZRs down to their absolute bare frame, with nothing at all left on them, then having them powder coated or repainted from bare metal up. Given that this was my first time, I was already freaking out about the amount of bits I had removed, and whether or not I would ever get them back on again. Even if I had the guts to strip it completely bare, there was the cost involved in respraying the whole thing, which would have been in the multiple hundreds, and I was already starting to look at which corners I could cut to keep costs to a reasonable level.
My other options were to do some minor touch-ups on the frame, or to mask it off on the visible areas and spray it with something that was a close match. After changing my mind multiple times, I finally decided to respray it with a rust-inhibiting paint in a spray can, which cost all of AUD18 and to the naked eye was a pretty darn close match to the original. Certainly close enough that only the true aficionado would notice – maybe.
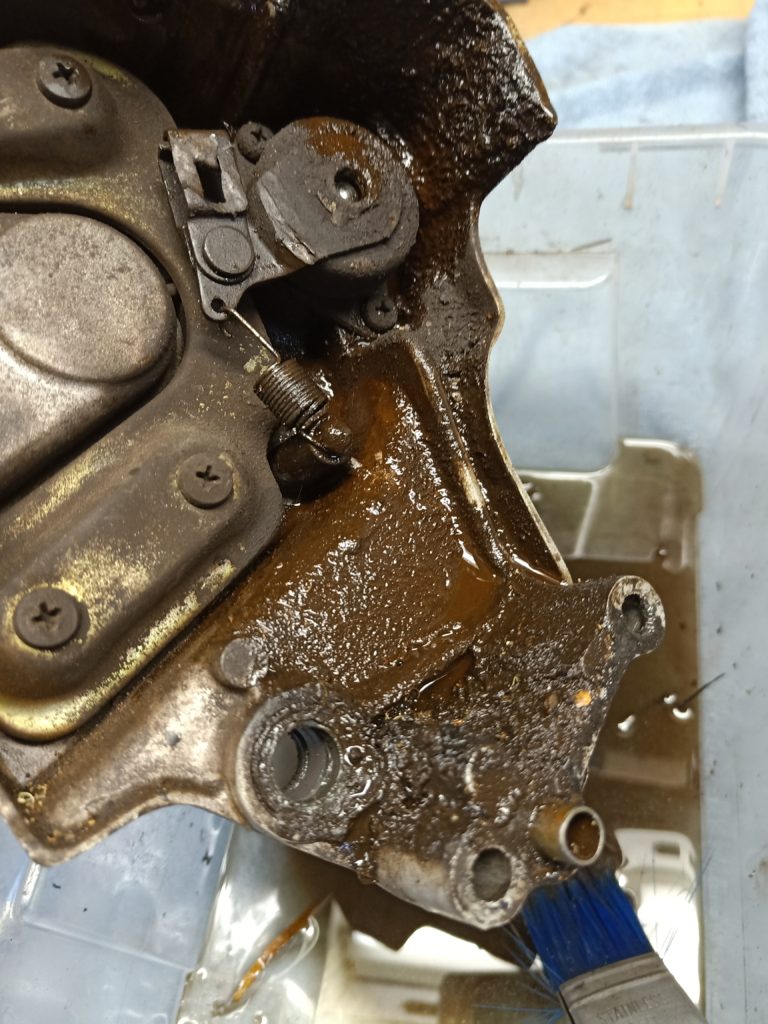
Before I could do the easy bit of spraying the frame however I had to clear out thirty years of gunge from behind the motor, around the swingarm and anywhere else near the chain. The worst of it all was the external clutch mechanism, as shown in the picture. This needed a heap of kerosene, a screwdriver and a stiff brush to remove, and took a solid half hour to clean up.
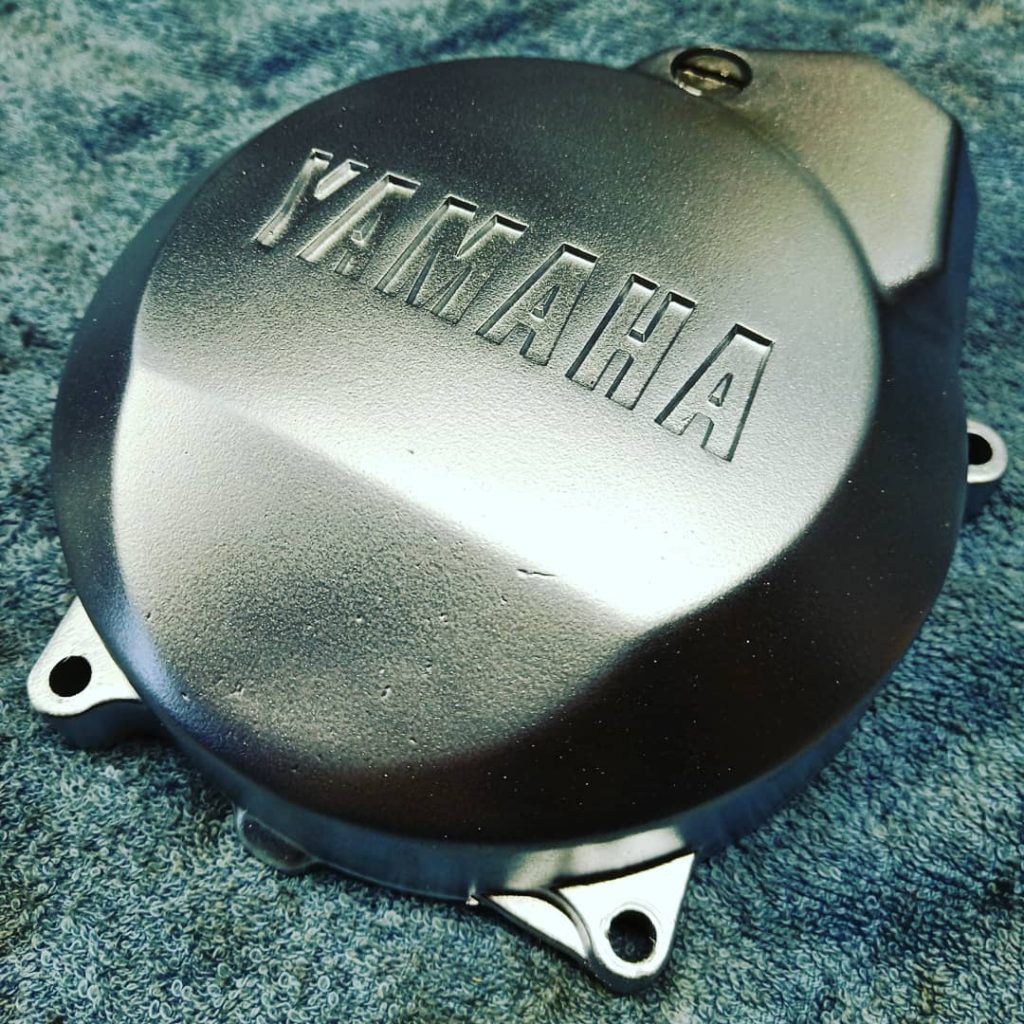
This also raised a question of whether any of the exposed bits of the motor or frame would be better replaced rather than resprayed. Case in point was the stator (alternator) cover, a very visible aluminium cover that had been slid down the road at least once. To get a new one of these is in the order of AUD70 for a generic aftermarket job, or upwards of AUD200 for an OEM one. The alternative, as with the frame, was to respray.
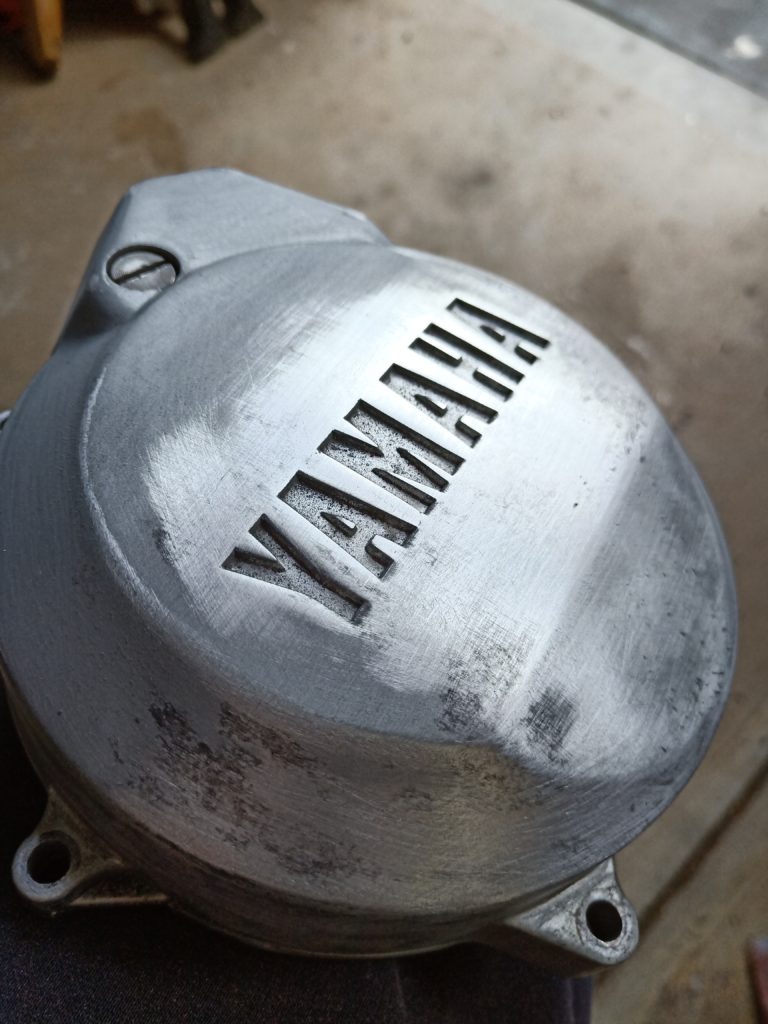
It appeared that the former owner had already had a crack at respraying the scratched cover, but it also appeared that they had not taken into account the material – aluminium. For those who have never worked with it, aluminium doesn’t like to be painted, and it needs a special ‘etching’ primer underneath to make the paint stick. If this isn’t done, the paint bubbles and flakes off, which is what was happening with this one. That said, with some sandpaper and elbow grease, all but the deepest gravel rash had been removed, primer applied and the same topcoat used as I was going to use on the frame. The result? Considering the cost (a few dollars), this would absolutely be good enough.
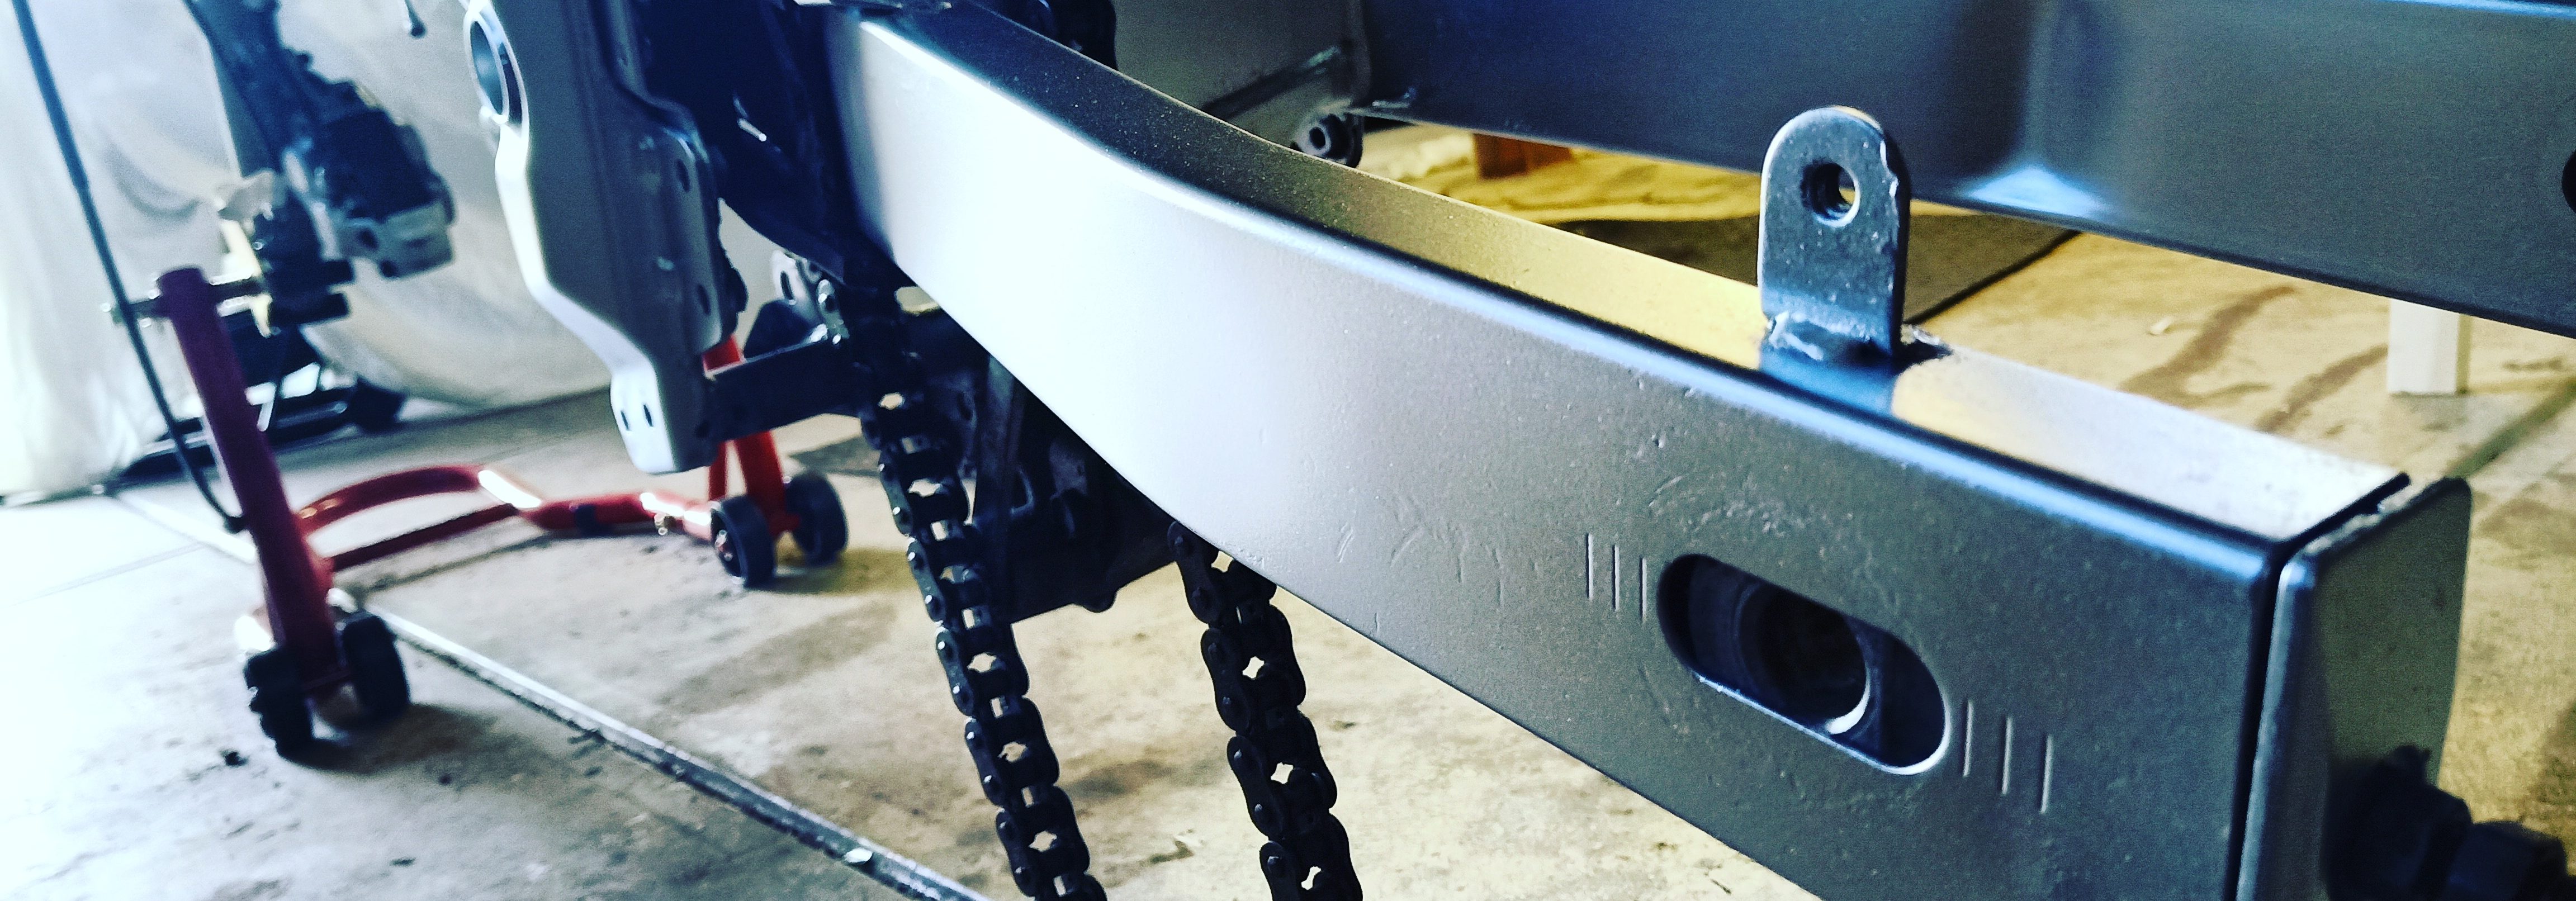
The downtubes, which are the sections of frame which can be unbolted from the main section of frame above, were easy – steel, almost impossible to see on the finished bike given they are hidden under fairings, so a quick and dirty sand and spray was enough for them. This then left the main section of the frame.

After removing the tatty ‘Deltabox’ sticker, using a power drill with a wire brush attachment to remove a few rusty spots and giving it a quick zip with some sandpaper and a thorough final clean, it was time to mask up. The philosophy was to paint anything that would be visible on the final product, but to leave any areas along that would never be seen by anyone other than me (for example the rear subframe, i.e. the section under the passenger seat). One blessing at this time was the damp winter air outside, which kept dust down and ended up making for quite good conditions, albeit a little slow on the drying side. Three coats of the rust inhibitor silver and the job was done, and whilst not a pristine job, it looked a million times better than it had done.
The wheels were yet another challenge. They were extremely tatty, and a combination of unpainted aluminium on the ‘spokes’ and painted aluminium near the tyres. I had gotten a quote from the spray painter, who said they could be pressure cleaned on the aluminium sections and then given a respray for AUD150 each, plus probably another fifty to get the tyres removed and put on again. Once more, this was an area where corners could be cut without making a significant difference to the end product, so I scrubbed the bejesus out of the aluminium sections and then taped up the painted parts, sanded them back, and put on another two coats of primer and topcoat (this one a gunmetal grey which was also close enough to the original). The end result wasn’t perfect, but it was another few hundred back in the kitty.

I had also taken off a few other smaller bits while I was at it, rear footpegs and holders, rear caliper bracket, brake stays, intake ducts and the like, and given them a quick spray as well, and the end result was as good as I could have hoped for. The fact that the new ‘Deltabox’ sticker seemed to match very well with the new frame paint reinforced that as far as cheap fixes go, this one had worked an absolute treat – and I had avoided spending probably the better part of a grand in the process.
This had filled in another couple of weekends, and the end result was a rolling chassis which was getting pretty close to being ready to slot a motor back in. Now all I needed was the motor…
Next up: The parts arrive, and the plot thickens