There is an old adage that war is long periods of boredom, punctuated by moments of sheer terror, and in that sense, this rebuild has become a war.
In my last post, several weeks ago, I mentioned that I was filling time while waiting for the one final part I needed to arrive so I could start the rebuild. This was incredibly frustrating, as I had several weekends that were free of commitments where I could have been slowly plodding along with the rebuild as we edge closer to Spring, but no.
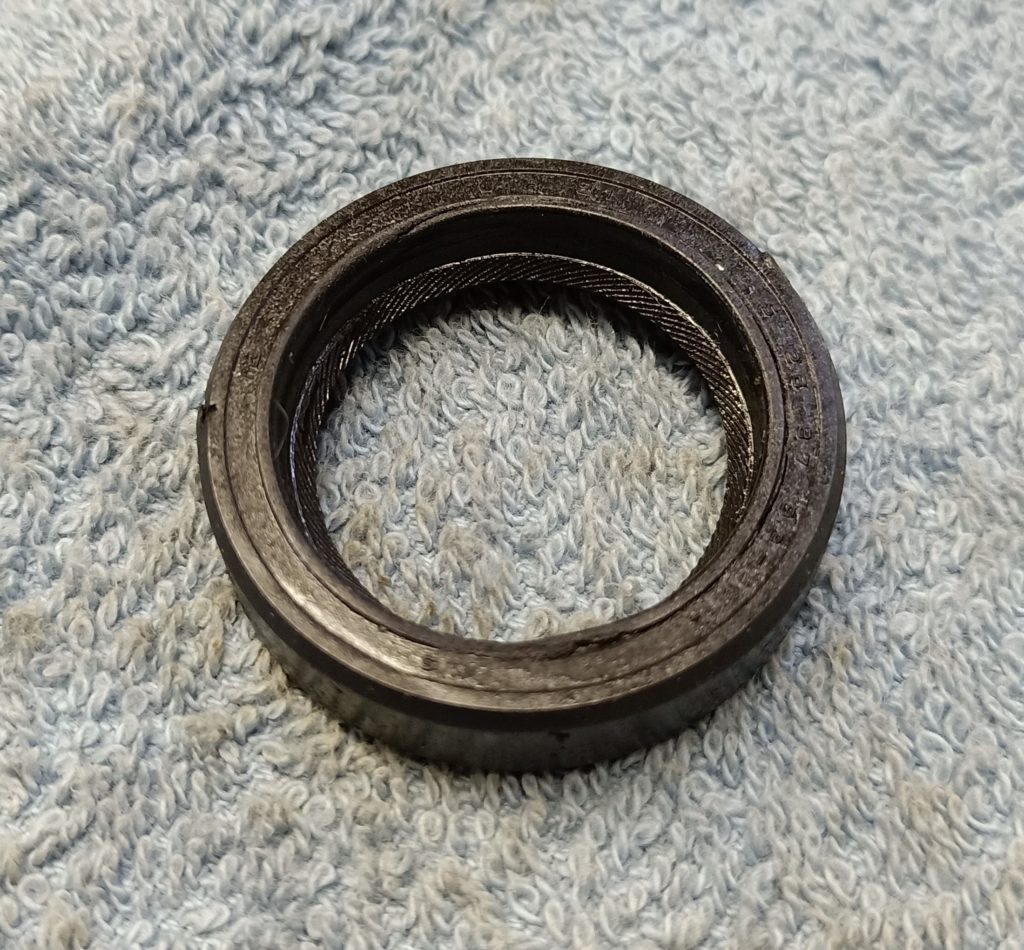
It was with great excitement then that I got the message from my local Yamaha dealer to let me know that the final part was in – the oil seal I needed for the end of the crankshaft that would let me get on with the rest of the job.
But as has been the case before, things didn’t go to plan. I tried to fit the seal over the end of the crankshaft, but no matter what I did, there was no way it was the right one. Way too tight, both on the crankshaft and in the section of housing that it was meant to fit. This was another moment when I was looking at the engine and saying to myself that there was no way that this could be happening. The part number was right. The location was right. It looked more or less the right shape. But there was no way this thing was gonna fit, no matter how I attempted to persuade it.
Things were doubly weird too, as my engine had a different looking seal at the other end of the crankshaft that was already on there, and when I was looking at the layout diagrams that one didn’t exist. So there I was, stuck with a phantom seal at one end and one that didn’t fit at the other.
In desperation I once more asked for help from the FZR forums on Facebook, and once more, one of the good folks who has been there and done that many times before me came to the rescue. The conversation went like this…
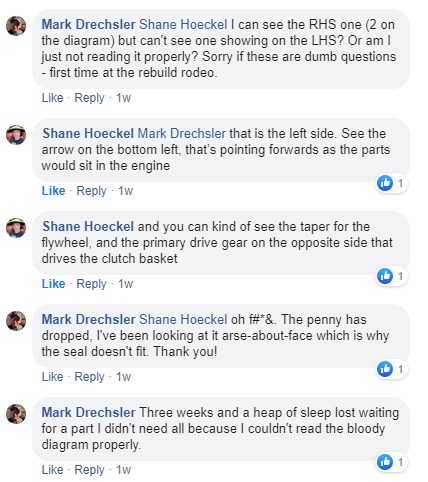
Yep, you guessed it, like the former owner of the engine who I chastised in an earlier post for not being able to read a diagram the right way around, I had done exactly the same.
The seal was already in place.
I had been waiting three weeks for a part that I didn’t need.
Fuck.
This probably had more of a mental impact than anything else, since nothing had been damaged, all I had lost was time. I think it did highlight to me that working on a project bike through the depths of winter for me is a double-edged sword. I struggle with mental health during winter – the shroud of cold, wet air that comes with living in the Adelaide hills for chunks of winter does my head in. I can understand why so many people move to Queensland from places like Adelaide and Melbourne. Working on a project is good for keeping my hands and mind busy when I can’t go out cycling (ok, I could, but I hate riding in the wet), which is good – but my mental resilience is also at it’s lowest, and so when things like this happen it has more of an impact on me than if it had happened during the warmer months. The previous winter I’d just been working on pushbikes, which are a far simpler prospect, and I probably did bite off more than I could chew doing my first full rebuild in the depths of winter.
On the plus side, it was another small triumph for the part of my brain that was looking at a part that didn’t fit properly and thinking ‘I don’t care what the diagram said, this isn’t right’. One thing this project has taught me is that my intuition in things like this is actually not bad, and next time I’ll trust myself a lot more.
Anyway, this then let me move rapidly from the long period of boredom into two moments of sheer terror, before receding back into boredom again.
The first of these was reassembling the crankcase. For the uninitiated, on a motorbike this is in essence the two halves of the outer of the motor. Think of it as an eggshell, and inside are all the gooey bits like transmissions, clutches and various shafts spinning around at terrifying speeds.
This crankcase, like many others, is made of some variant of aluminium. Now aluminium is great because it’s light and helps keep weight down, but it is also quite soft relative to steel, and if it gets cracked or damaged then it is also far harder to fix than steel. The workshop manual has some big warnings about reassembling the crankcase, along the lines of ‘for Christ sake, make sure you get everything lined up properly before you tighten the bolts, because if even one little thing is out of alignment then you’ll crack the outer case and that’s pretty much the end of the story’. It was then with – literally – trembling hands that I lined everything up, checked it twice, and got ready to assemble the cases.
Putting a crankcase back together – now that I’ve done it – isn’t that hard. Put the two halves back together will all the internal bits in the right place, and then tighten up thirty-odd bolts in the correct order to the correct torque. After getting the first few bolts in and seeing that the whole thing was indeed lining up as it should, the rest was quite straightforward…
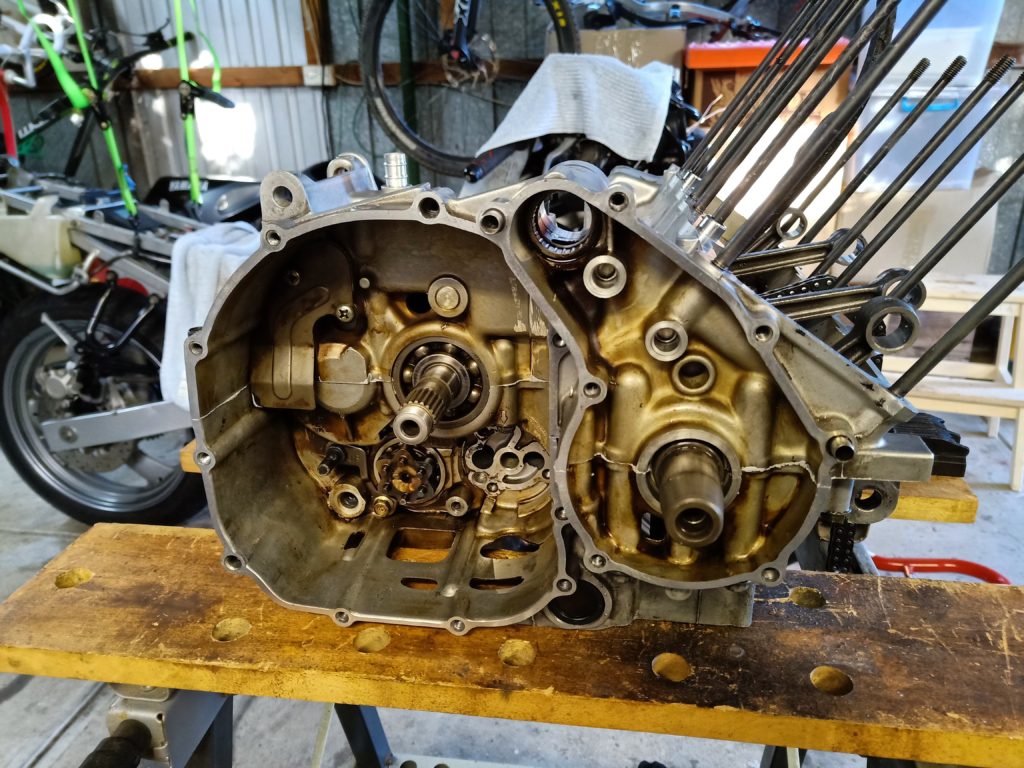
Until I reached Bolt 14.
I had been struggling a little to get the torque wrench to behave. It was designed to measure larger torque settings than the weenie little bolts that were holding the case into soft alloy casings. A couple of times I’d stopped and twiddled with the torque setting, backed it right off just to make sure I wasn’t over tightening anything and gradually built up. I was quietly wishing that I had the right adaptor to let me use my small pushbike torque wrench that would have been more appropriate.
And then it happened. Moment of terror number two.
Bolt 14 got tighter, and tighter, and then all of a sudden got looser with a definite ‘pop’. I had over-torqued it.
There are few things in life that I’ve experienced that elicit the same feeling of sickness in the stomach that over-torquing a bolt does. It is the awful realisation that at best you’ve just sheared a bolt off that may or may not be a nightmare to extract, and at worst you’ve stripped a thread in the housing, or even worse than that you’ve cracked the housing.
Standing there I realised that I may well have just damaged the casing to the point that it would need repair work that would necessitate stripping it back down again, and then praying that it was actually fixable.
I thought about leaving it, to the point of putting all the other bolts back in. Maybe nobody would ever notice? It was only one bolt out of thirty – how much would it matter? Thankfully another sage voice (thanks Bill) chimed in to the one lurking in the back of my head to confirm that I needed to take the plunge, attempt to back the bolt out and see what the damage was.
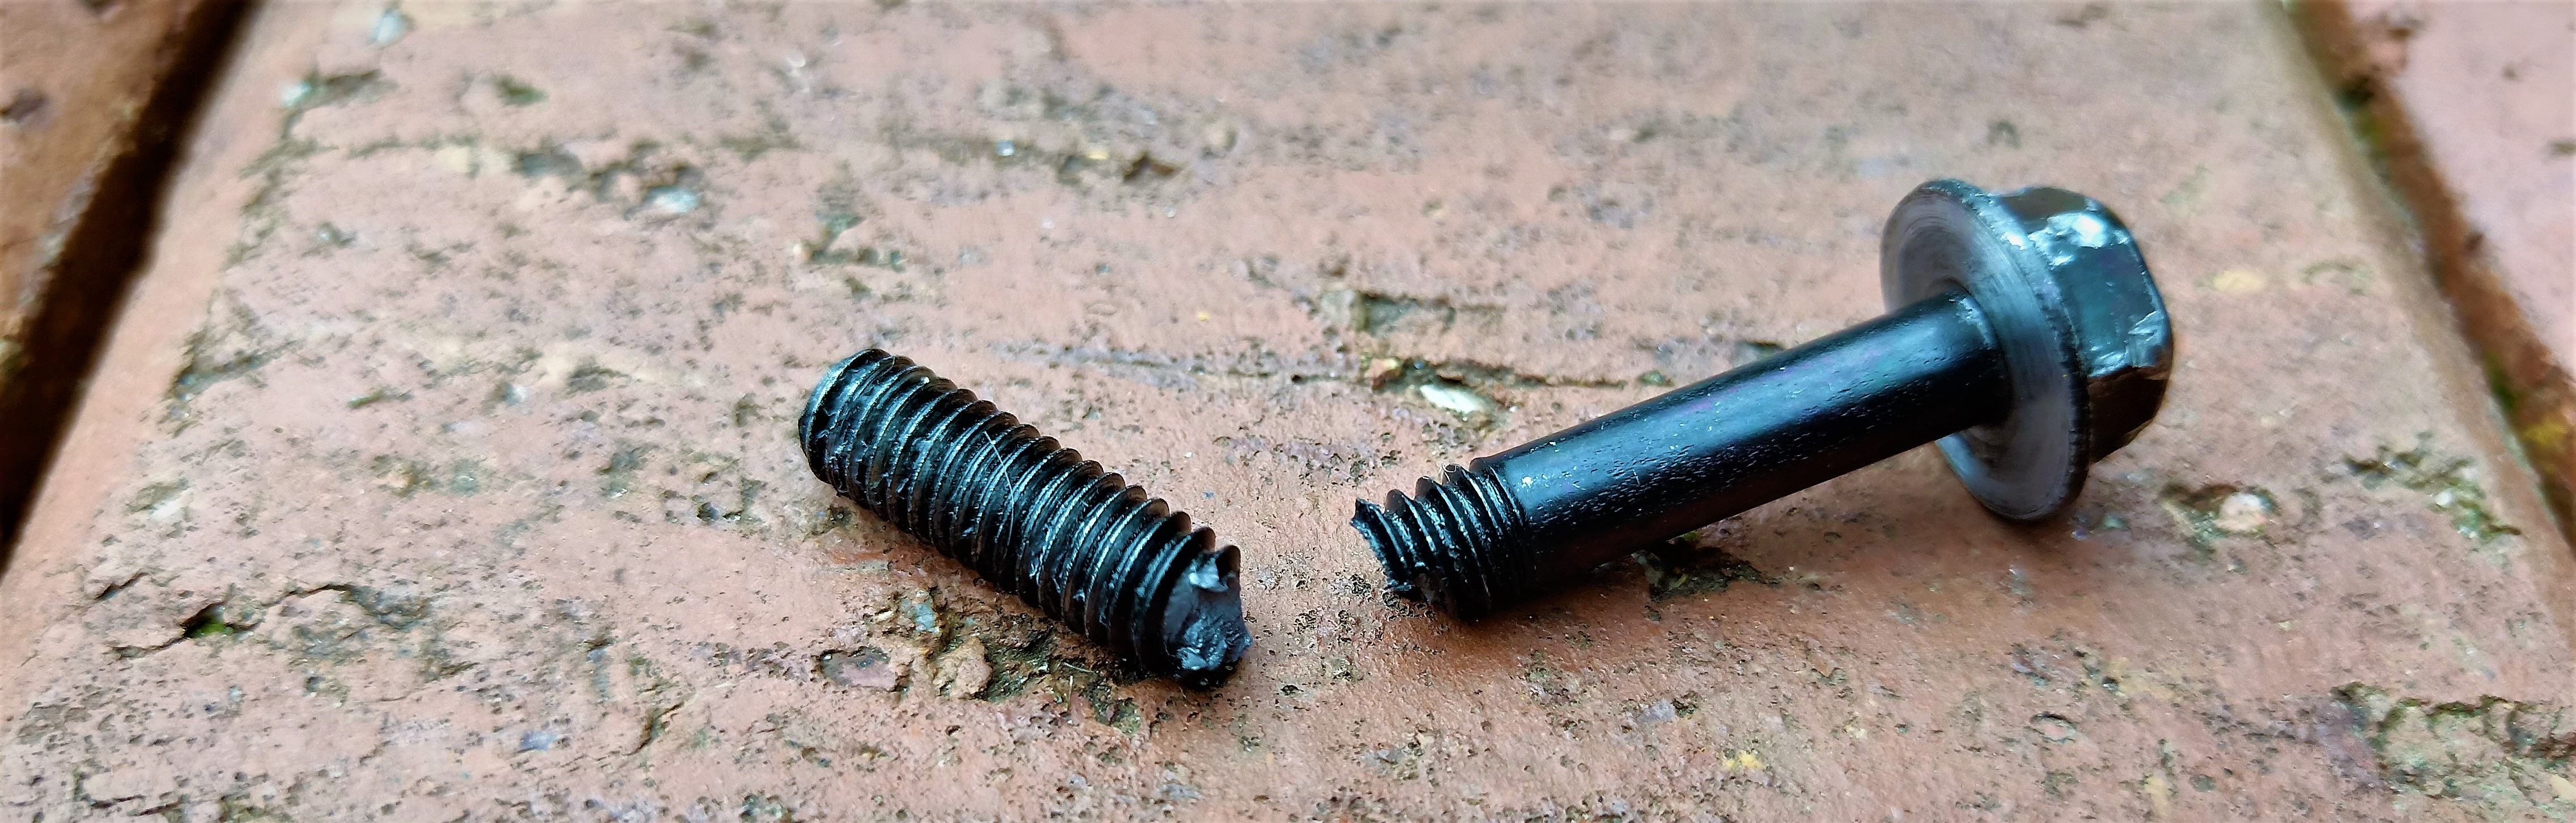
I had a somewhat restless night building up the courage to see how bad it was, and then grabbed the socket to back it off and see what it looked like. Slowly, miraculously, it loosened, and then came out – warped, but complete. The bolt had started to give way before the casing had, but I’d stopped early enough to get it out of there with zero damage. It was, at last, a feeling that I had had a lucky break.
Speaking of breaks, the header image of this post was the bolt after I had removed it and tried to snap it with my fingers – it came apart easily, and I realised once more that I had very much dodged a bullet.
I ordered another replacement bolt and started to reinstall other parts, figuring that one bolt out of sequence in terms of tightening was something I could live with.
I made it through the external gear selector, the oil pan, the starter clutch and housing, and then went to install the oil pump – when I realised that the ‘complete’ gasket kit I had bought was actually ‘complete, except for the oil pump gasket, because, you know, why would you need one of them bro?’
Once more I found myself at an impasse, with another week or two needed to wait for another stupid little part to arrive before I could continue the rebuild. At least I was very clear that I needed this one, unlike the stupid oil seal…
In parallel with this I got the decals put on to the newly painted fairings. I contemplated putting them on myself, but the cost of a bit over a hundred dollars to get a signwriter to do it properly seemed a good investment in the knowledge that I’d hack them up if I had done it myself and then had to spend the rest of my days cursing that I hadn’t just taken it to a signwriter…

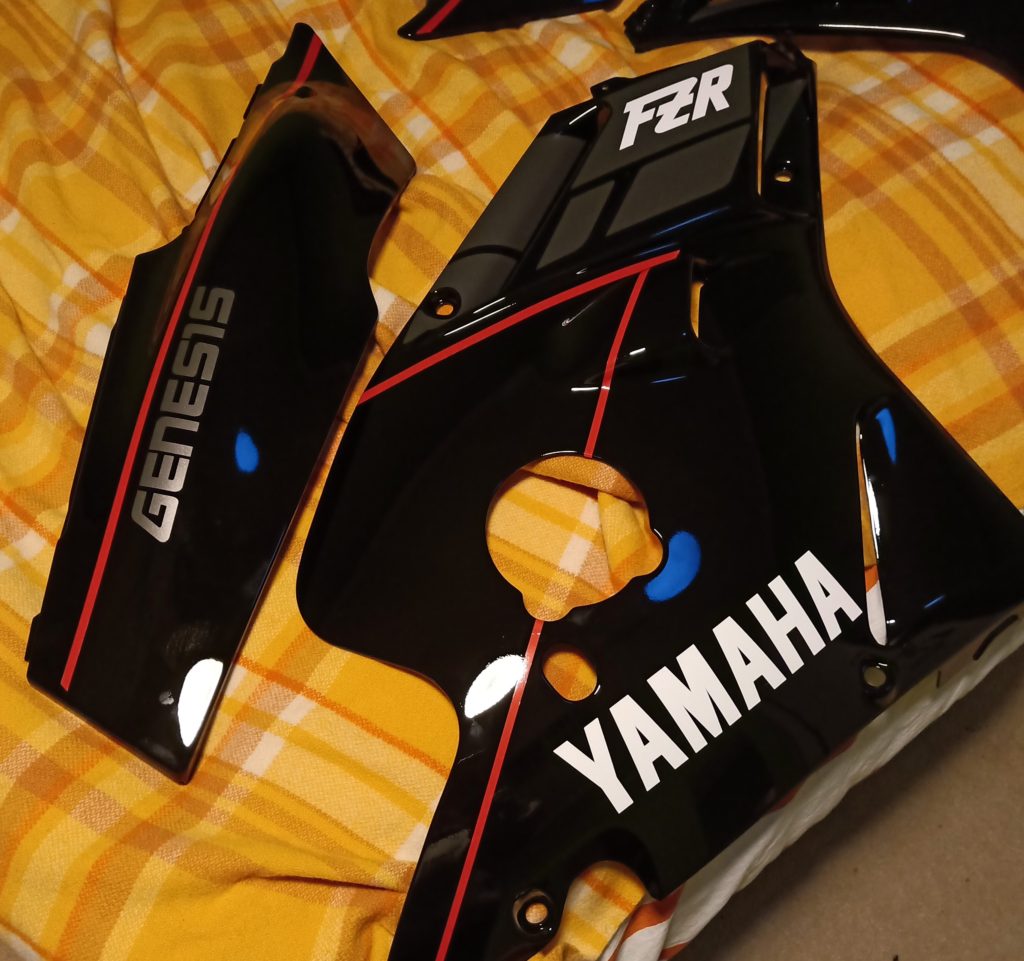
The process took around ninety minutes, and the end result was fantastic. Many thanks to Aaron from Signs by Knight for doing such a great job. I may have been back in another holding pattern waiting for parts to arrive, but at least I could now see just how awesome the finished product was going to look when it finally got its skin back on.
With the pause button hit once more, it was time to turn a little bit of attention to a parallel project that may have found its way to the shed during the last period of boredom…
Next time: the Victorian track/parts bike