Last time I proudly stated that…
The end result is a motor that is damned near ready to be installed…
Me, in my previous post.
All I needed to do was to adjust valve clearances – how hard could that be? Right?
Well, it turns out that it isn’t all that hard, just really fiddly, particularly when attempting to line up the cams perfectly with the markers that show when they are in the right spot.
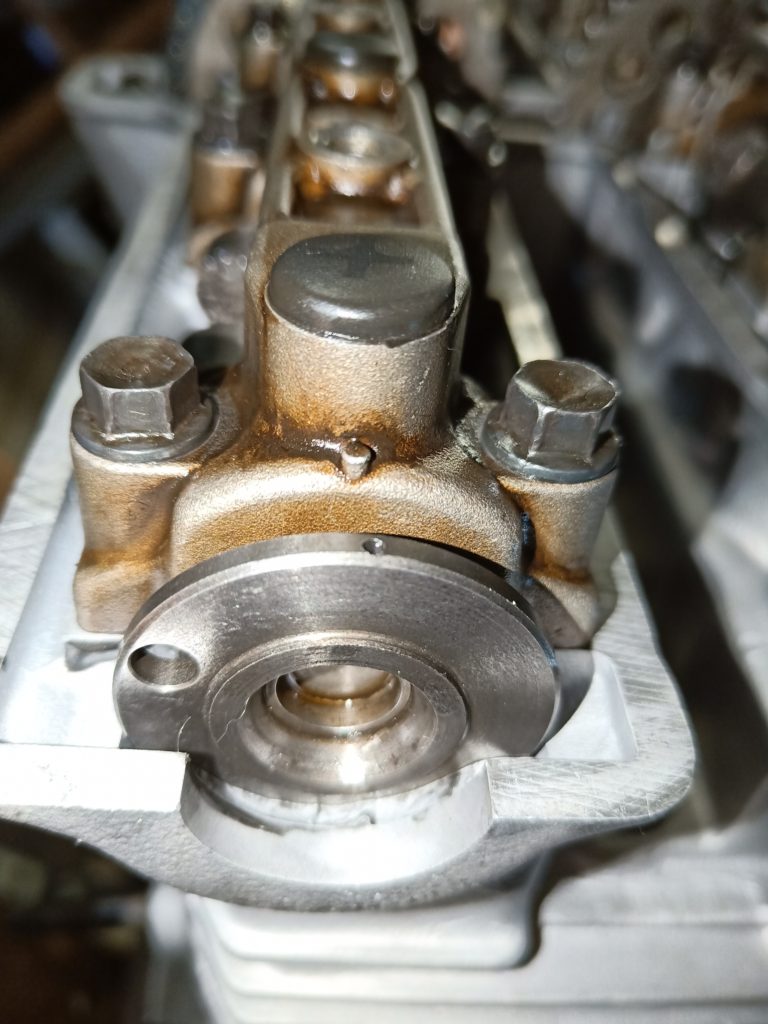
I made the mistake of not measuring the valve clearances before I started to tear down the motor, so I have no idea if they were always so far out. For those who have no idea what I’m talking about, valve clearances are the tiny gaps between the camshafts (long metal shafts with bumps at specific points along them designed to push valves as they spin) which turn at ridiculously high speeds, and the cam buckets, little metal cups that sit on top of the valves to create a smooth surface for the cams to push against. The gaps need to be within a defined tolerance, for this bike between 0.1 and 0.2mm for the intakes and between 0.2 and 0.3mm for the exhaust. Too much or too little gap and the bike will either run like rubbish or will potentially cause damage to the components, which is a major problem. The post-rebuild clearances were all too small, in some cases so small that I couldn’t fit a 0.04mm feeler gauge between them. Whether they were like this before or whether this was a result of the rebuild of the head I don’t know, but whatever the cause, they couldn’t stay that way.
To adjust valve clearances on a bike like this, one needs to add in tiny little metal discs between the bucket and the valve, called shims. The diagram below shows, for each valve, the already-installed shim, the measured gap, and the size of shim needed to get the clearance back within the desired tolerance.
To add to the tedious nature of the task, this being a four cylinder bike with four valves per cylinder means sixteen gaps to get right. For the first time in my life I felt jealous of people running single cylinder bikes, or even twins, ones with perhaps only two or three valves per cylinder. None of this was hard, just tedious and fiddly.
To make matters worse, to change shims requires removing the camshafts, which leads to several flow-on effects:
- Fear that I’ll snap one of the camshaft bearing caps, which need to have their bolts undone and tightened up in a specific way or, according to the manual, they can snap, which can mean the end of the head (the bearings and the head are matched, so it isn’t as simple as getting new ones);
- Fear I’ll drop one of the small parts (like a shim, dowell or bolt) down into the engine through the hole that the cam chain runs through, which would mean very probably stripping the whole thing down again. I’ve seen Gumtree bikes that have been sold for very little because of this very thing – ‘dropped a screw somewhere and taking it to bits will cost me more than the bike costs, so someone please just take it’;
- Fear I’ll drop the camchain down into the case and not be able to retrieve it with wire or something – see the previous comment; and
- Frustration at attempting to get the camshaft markers lined up perfectly. This is necessary to make the timing of the motor correct, so that for each cylinder the valves are opening only when the piston is out of the way – get that wrong, valves start hitting pistons and the whole thing is fried.
On the last point, in theory there are marks on the end of each camshaft that are meant to line up perfectly with marks on the bearing caps, but no matter how I try, I can never get them quite perfect.
Intake 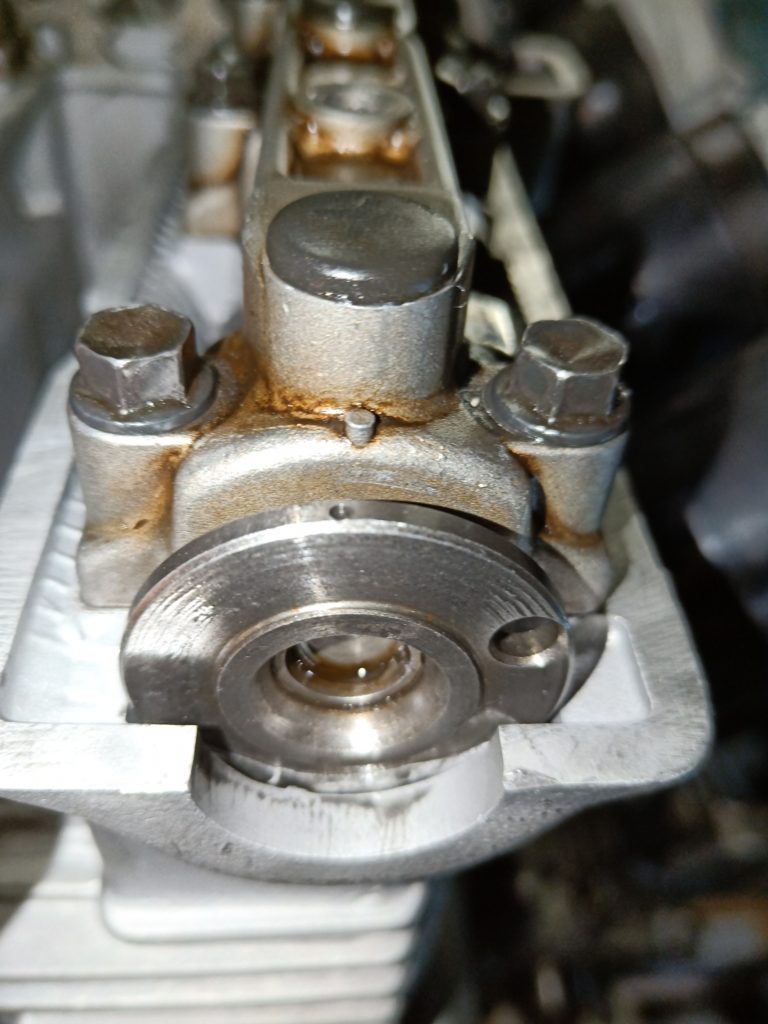
Exhaust
Taking them out again and moving them one sprocket to the other side simply put them both marginally out in the opposite direction. I took the valve cover off the old motor, which I know was functioning as it should, and I could see that the marks weren’t lined up perfectly on that one either, and I tried turning the motor over by hand and it turned freely, so it isn’t bumping pistons against valves, but still – it’s just not quite right.
This is one of those occasions that remind me that I am no good with fiddly tasks that require working with tiny parts, and that this can be a great trigger for all sorts of other anxieties.
This is also one of those occasions when I have to remind myself that it’s a 1990 Yamaha, not a space shuttle. It is highly probable that this is fine, and that I’m worrying for nothing. But still, the worry sits there…
it’s a 1990 Yamaha, not a space shuttle
Anyway, I now know what shims I need to buy to get the clearances right, so the pause button gets hit again as I wait to go see the team at Yamaha World again, and then wait for another spare day when my head is in good enough order to get on with the fiddly task of finalising the build.